A gallery wall works when the layout gets locked in before you touch a drill — get the spacing, scale and hanging order right and you end up with a curated wall in 2026, not a cluttered one.
- Lay your gallery wall out on the floor or with paper templates before drilling a single hole.
- Keep gaps between frames at 5-8cm for a cohesive look that still reads as considered.
- Anchor the layout with your largest or boldest piece centred at 144-160cm, then build outward.
- Mixed sizes and frame styles beat a matching set for a lived-in gallery wall in 2026.
- Framed prints hold their line better over time than unframed pieces once the layout is set.
Why this matters
Most gallery walls fail for one reason: someone starts hammering before the layout is settled. The result is a wall full of nail holes, uneven gaps and a piece that's clearly an afterthought jammed into a leftover space.
A gallery wall is really a composition exercise, not a hanging exercise. Get the composition right on paper or on the floor first, and the hanging part takes fifteen minutes. Choosing pieces with a mix of sizes matters here too — read the guide on how to choose the right size wall art for your wall before you start collecting frames, because sizing mistakes are the hardest thing to fix once everything's on the wall.
What you'll need
- Butcher's paper or brown packing paper (enough to trace every frame)
- A pencil, scissors and measuring tape
- Painter's tape (low-tack, won't mark paint)
- A spirit level
- Picture hooks or wall anchors rated for your wall type (plaster, brick, rental-safe strips)
- A hammer and step stool
- 5 to 9 artworks in a genuine mix of sizes — at least one large anchor piece, a few mid-size framed prints, and 2-3 smaller pieces to fill gaps
Don't buy the artworks last. Sort your pieces first, then plan the layout around what you actually have — including any framed prints for gallery walls already sitting in a cupboard, plus originals or new canvas prints you're adding for 2026.
The steps
1. Pick a layout style before you pick a wall
Decide between a grid (even rows, matching frame sizes), a salon-style cluster (mixed sizes, irregular gaps), a staircase run, or a symmetrical pair either side of a focal point. This decision drives every measurement that follows, so nail it down first. A cluster style forgives an uneven wall or an odd-shaped nook far better than a grid does — grids need a wall wide enough for at least three even columns to look intentional rather than half-finished.
Common mistake: picking a tight grid layout for a wall under 1.8m wide. It ends up looking cramped instead of gallery-like.
2. Measure the wall and mark the centre
Measure the total width and height of your hanging space, then mark the horizontal and vertical centre point in pencil or with a small piece of tape. Most gallery walls read best when the visual centre sits between 144cm and 160cm off the floor — roughly eye level for an adult standing in the room.
This centre point is your anchor for everything else. Skip it and you'll find the whole composition drifting toward one side by the time you've hung the sixth piece.
3. Trace and cut paper templates for every piece
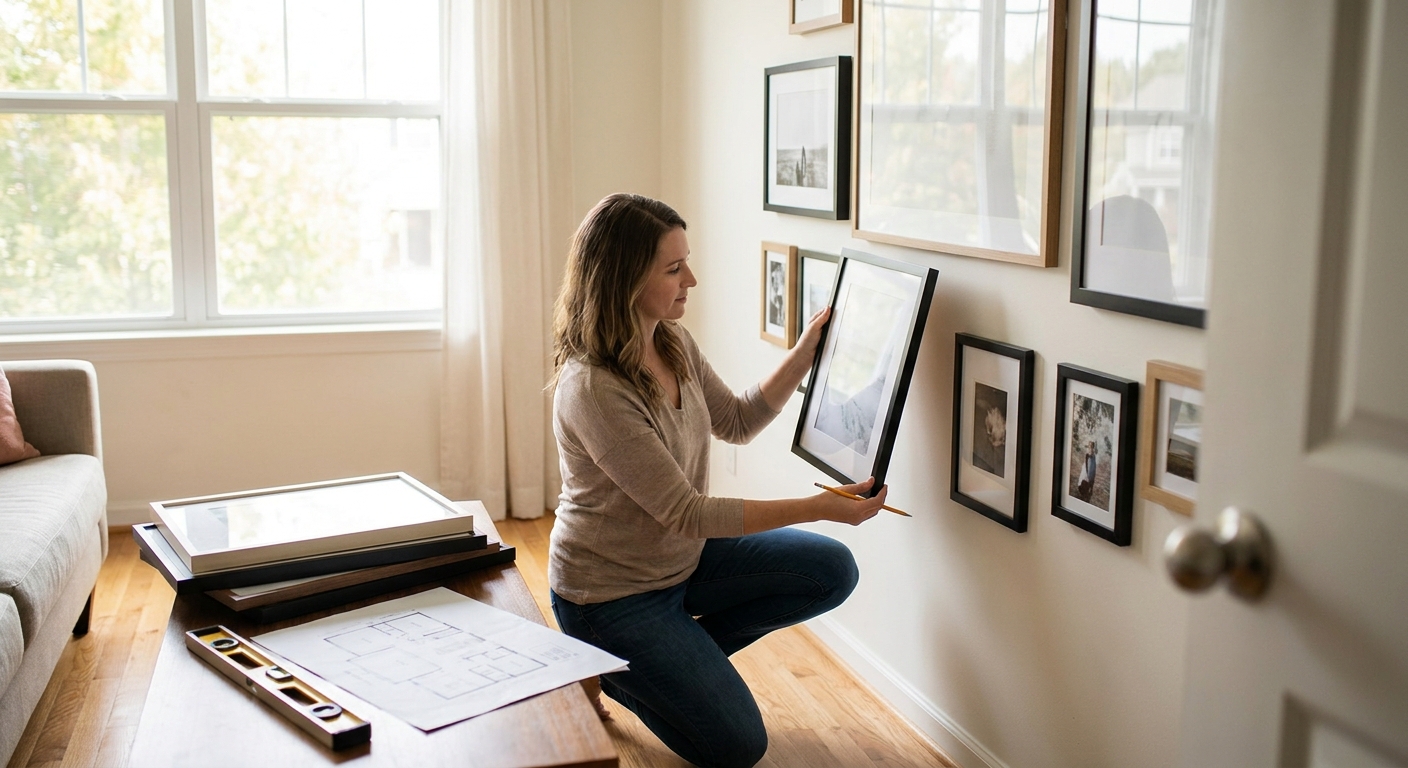
Lay each frame face-down on butcher's paper, trace around it, and cut out a template. Label each one with the piece's name on the back. This step feels slow but it's the one that saves you from patching holes later — you get to test the full layout without a single nail going into the wall.
Expected outcome: a full set of paper stand-ins you can move around freely for as long as it takes to get the spacing right.
4. Tape the templates up and set your gaps
Starting from your centre mark, tape up the templates using painter's tape, working outward from your largest or boldest piece. Keep gaps between frames at 5 to 8cm — tighter than that and the wall looks jammed, wider and it stops reading as one composition. Use a scrap of cardboard cut to your chosen gap width as a spacer while you tape, so every gap matches without re-measuring each time.
Common mistake: eyeballing gaps instead of using a spacer. Small inconsistencies are invisible one at a time but obvious once eight frames are up.
5. Step back, photograph, adjust
Walk to the far side of the room and take a photo on your phone. A photo flattens the wall the way a walking-past glance will, and it exposes lopsided spacing or an accidental lean toward one side that's hard to see standing right in front of it. Adjust the paper templates until the photo looks balanced, then leave it for a day before committing — most people spot one more tweak once they've seen it in different light.
6. Hang your anchor piece first
Once the paper layout is confirmed, hang the largest or most eye-catching piece on its exact mark first. Everything else references off this one frame, so get its height and level right before moving on. This is also where a genuine statement piece earns its keep — a bold framed print for a gallery wall centrepiece anchors the whole composition far better than starting with a small filler piece.
7. Work outward and check level as you go
Remove one paper template at a time and replace it with the real frame, checking level with a spirit level after every second or third piece rather than only at the end. Catching a 3-degree tilt after two frames is a five-second fix. Catching it after eight frames means re-hanging half the wall.
Expected outcome: a finished gallery wall with consistent gaps, a level top line (or intentional stagger), and a composition that reads as one collection rather than eight separate decisions.


Troubleshooting
The wall looks cluttered even though you followed the spacing rule. Too many similar-sized pieces in a row reads as busy no matter the gap. Swap one or two mid-size frames for something noticeably smaller or larger to reset the rhythm.
Gaps look uneven despite measuring each one. Frame depth varies — a chunky wooden frame beside a thin metal one throws off the visual gap even when the tape measure says they match. Measure gap from the widest edge of each frame, not the wall mount point.
You're renting and can't drill. Use a staircase-style run or a single strong anchor piece with removable strips rated for your wall weight rather than a dense multi-frame grid — fewer holes, less risk, still a considered look. The peel-and-stick and rental-friendly framing options are worth a look before you commit to a layout you can't take with you.
The wall feels too matchy and a bit corporate. All-identical frame sizes in a strict grid reads as an office reception wall. Break it up with one original painting or an odd-sized piece that doesn't match the set.
A frame won't sit level after hanging. Wall anchors set at a slight angle are the usual cause. Pull the hook, plug the hole with a small dowel or filler, and re-drill 1-2cm to the side rather than fighting the same hole.
The planned layout doesn't actually fit the wall. This shows up when the paper template stage gets skipped. Go back to step 3 — it's the fastest way to catch a layout that's 20cm too wide before it's a wall full of holes.
Tools and resources
- Spirit level, painter's tape, butcher's paper, picture hooks rated for your wall type
- How to choose the right size wall art for your wall — for sizing your anchor piece before you start
- Framed prints for gallery walls, for pieces that need to hold a crisp edge over years, not just months
- Best wall art for above the bed — useful if your gallery wall sits behind a headboard, where centre height rules change
What to do next
Once the gallery wall is up, live with it for a week before deciding it's finished. Most people add one more small piece once the composition settles and a genuine gap becomes obvious. If you're planning a second gallery wall elsewhere in the house, work out the room's purpose first — a hallway or staircase run behaves differently to a living room feature wall, and the sizing rules shift accordingly.
FAQ
What's the best gap size between frames on a gallery wall?
5 to 8cm between frames is the standard gap for a gallery wall in 2026. Tighter gaps look jammed, wider gaps stop reading as one composition.
How high should a gallery wall be hung?
The visual centre of a gallery wall should sit between 144cm and 160cm off the floor, roughly eye level for an adult. Adjust down slightly if the room is mostly used seated, like a dining room.
Should gallery wall frames match or be mixed?
Mixed frame styles and sizes generally look more considered than a matching set, which can read as corporate rather than homely. One consistent frame colour with varied sizes is a safe middle ground.
How many pieces do I need for a gallery wall?
Most gallery walls use 5 to 9 pieces, mixing one large anchor piece with several mid-size and small pieces. Fewer than 5 tends to look sparse; more than 9 gets hard to balance without a grid layout.
Can I plan a gallery wall without drilling test holes?
Yes — trace every frame onto paper, tape the templates to the wall, and adjust the whole layout before a single nail goes in. This is the single biggest fix for uneven gallery walls.
What layout is best for renters who can't drill many holes?
A staircase-style run or one strong anchor piece with rated removable strips uses far fewer wall points than a dense grid, while still giving a gallery-wall look.
Is a symmetrical or asymmetrical gallery wall better?
Symmetrical grids suit wider walls and formal rooms; asymmetrical salon-style clusters forgive odd-shaped walls and awkward nooks better. Pick based on the wall's shape, not personal preference alone.
Should the largest piece go in the centre or the corner of a gallery wall?
The largest or boldest piece should anchor near the centre and be hung first — every other frame's position is measured off it. Hanging small pieces first tends to push the layout off-balance.
One last thing
The detail most people skip: photographing the paper-template layout before hanging anything. A flat photo on your phone exposes uneven weight distribution — one side heavier, one gap wider — far faster than standing in front of the actual wall, because a photo removes the sense of depth that hides small imbalances in person. Take the photo, sit on it overnight, then hang.